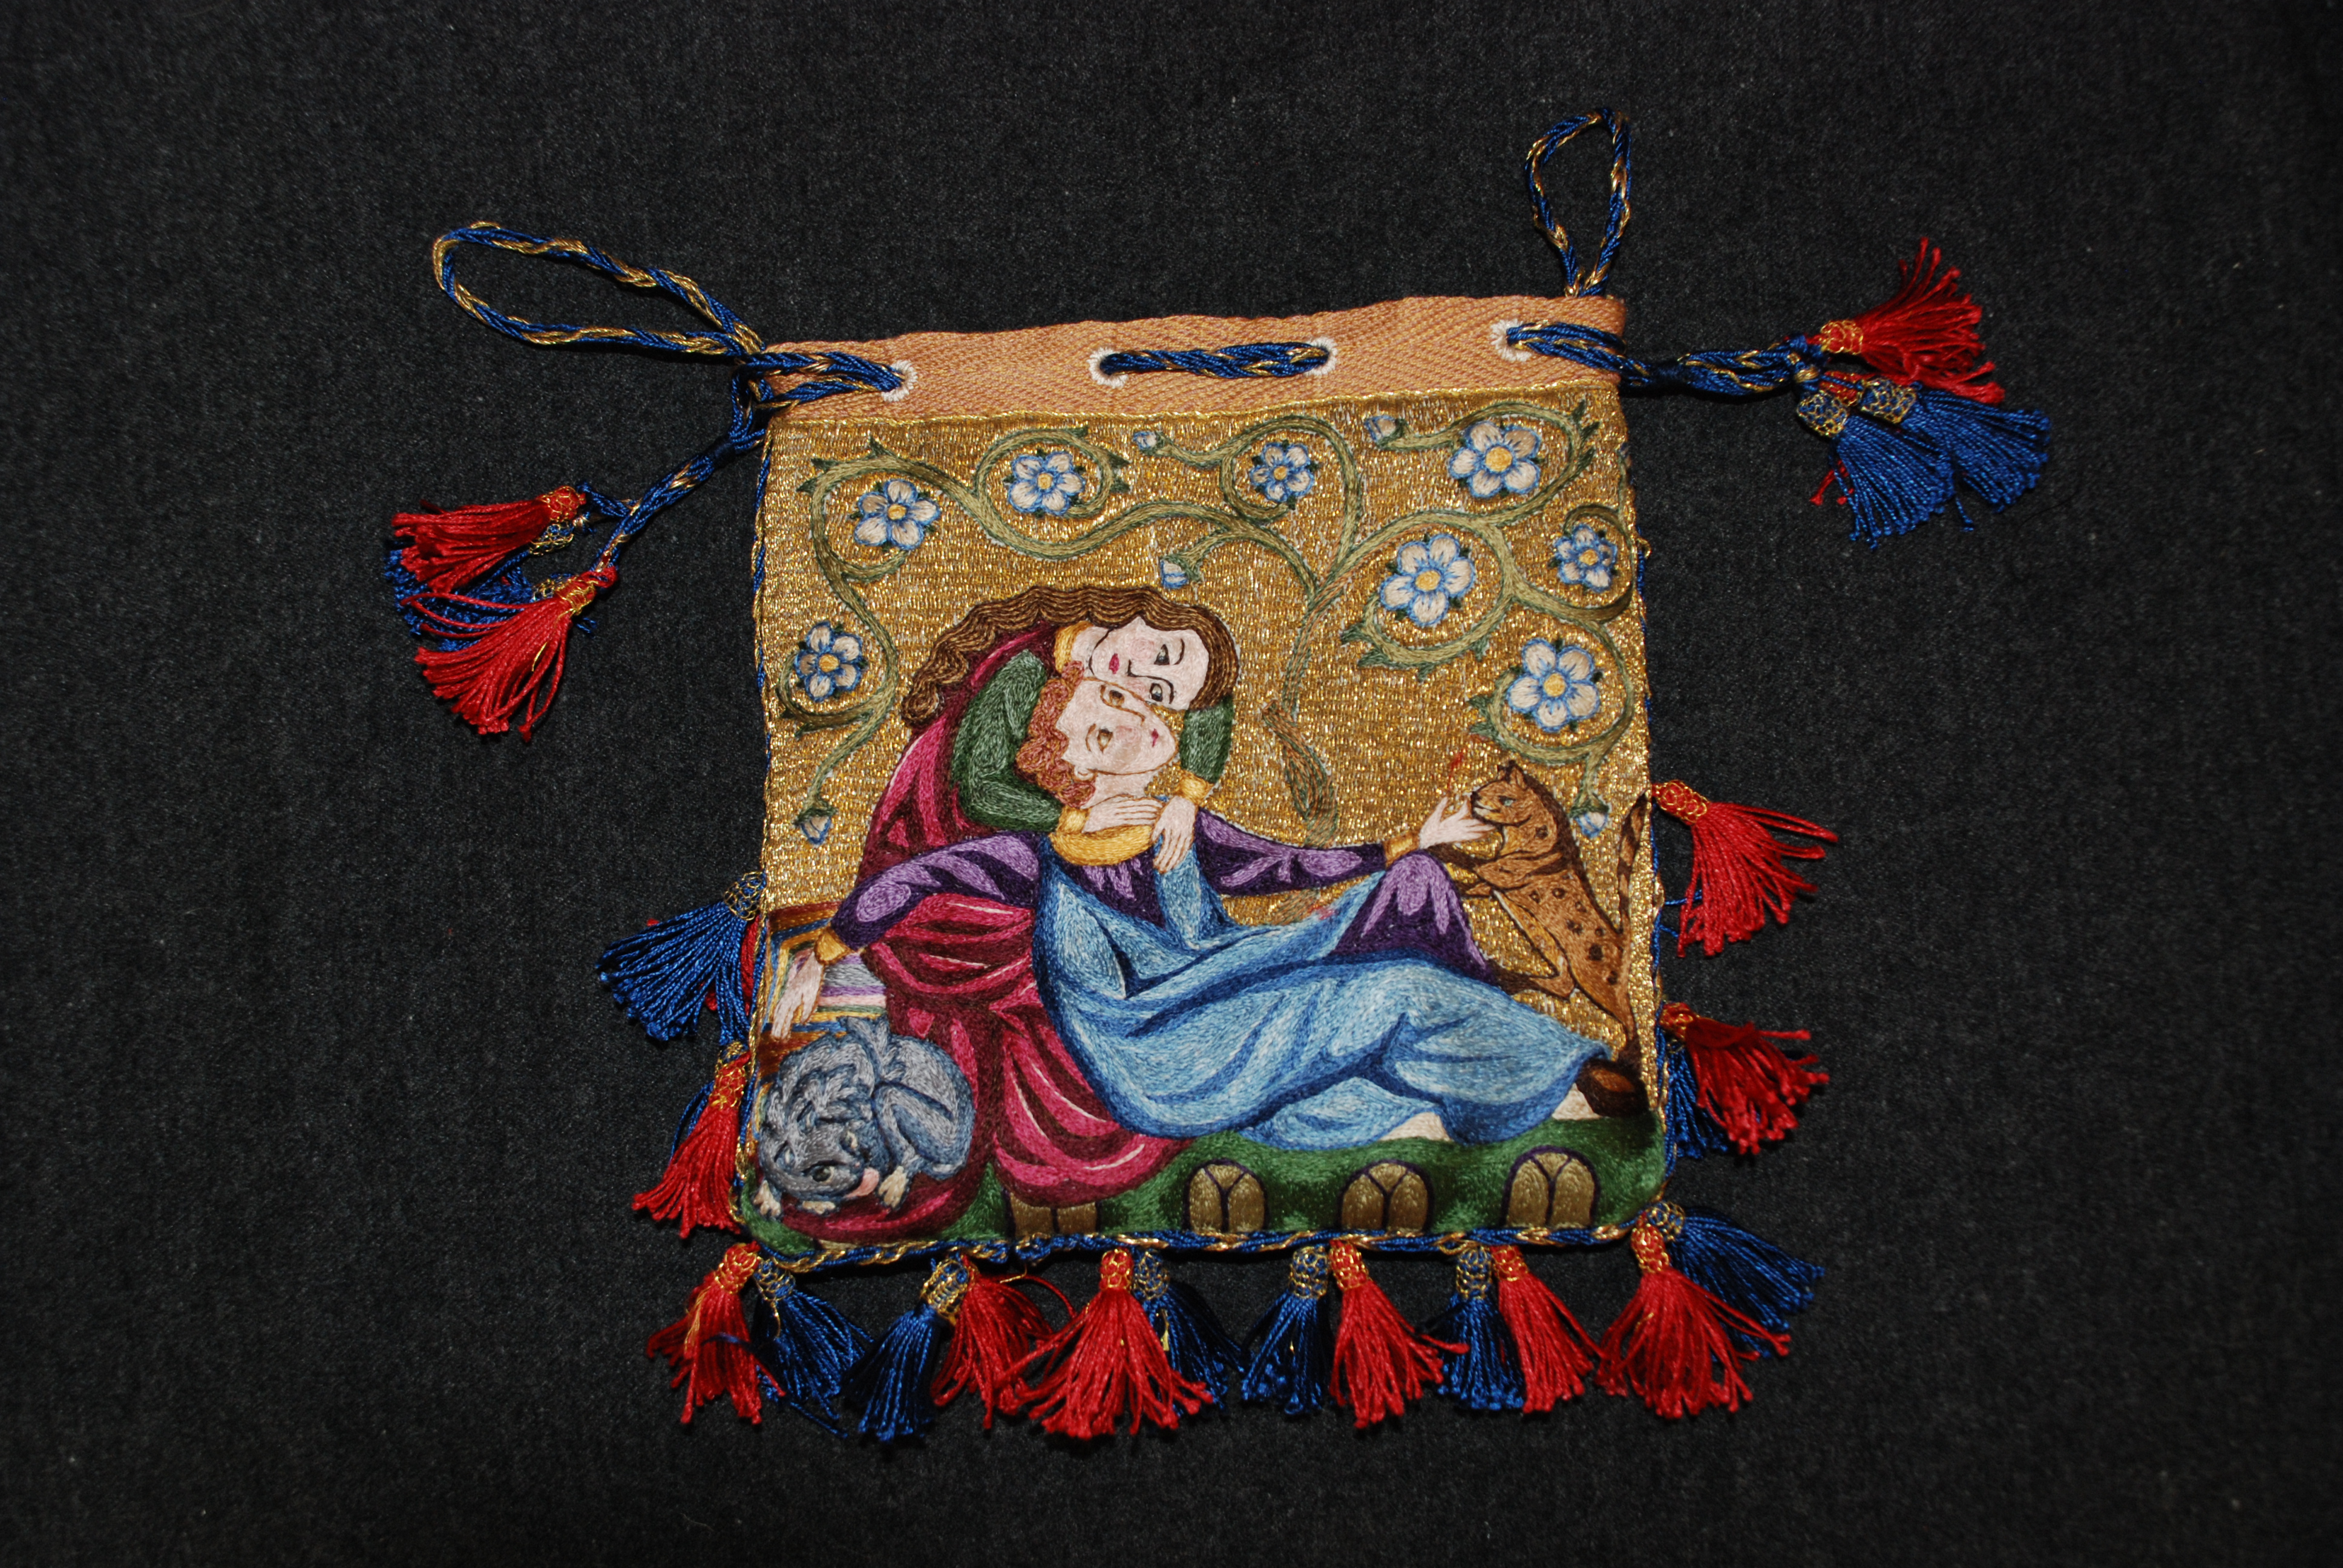
Assembling the lovers purse
I’ve been doing this for two days now. Ok, so I’ve had a cold and I’ve not been working very fast, but I’m still well and truly sick of it. Because this is a different assembly to the lovers purse I thought I’d document it.
Warning, this post contains a honking big mistake. Yes, I know I teach this stuff and am therefore not meant to make mistakes according to some, but I think some people are wrong. Everyone, no matter how skilled, cocks up sometimes. The way I see it, true skill lies in knowing how to fix your mistakes.
First I had to blend in a few millimetres of extra split stitch down the sides of the bed curtains on the nighttime panel. I think it came out mostly ok. There’s an inevitable bit of a wobble from the addition being done in hand, but it will be bent around the edges anyway, so…
because the backside of underside couching is quite rough, I decided to pad it by tacking a thick piece of linen round the back. This is attached by sewing through the back of the embroidery
Then I folded the edge of the embroidered linen over and tacked that down.
Next I whip stitched the two panels together, right sides out, using waxed linen. This is probably the more period way to assemble the purse, and in this case I chose it for the greater accuracy needed along the edges of the embroidery. I started at the bottom corner to ensure things lined up.
You need to pull it quite tight.
it was when I got the two sides together that I realised my mistake. The night panel wasn’t just narrower than the day ( the reason I’d delayed assembly was to make up those few millimetres down the sides, remember) it was slightly shorter and with a bit of a wobble on the top line.
At this stage adding an extra bit of embroidery really wasn’t an option as I was worried about damaging the edges if I unpicked, and the wobbly corner was probably too big for the tiny margin of fabric available anyway. I measured out the bit of silk tablet weave I’d put aside for the top, and decided I could fudge it. I sewed a piece of tablet along the short edge, making sure the straight edge lined up with the top of the day panel. Then once that was in place I whip stitched the rest of the tablet weave along the top.
This was the big mistake I referred to earlier. Measuring accurately. To be honest I had made a point of ensuring I measured each panel accurately before I began sewing. I think this problem occurs during finishing and stretching as much as anything.
All things considered I think that was the best fix option, although it’s most obvious from the side. I debated for a while about whether or not to couch a piece of gold twist along the side, wondering if it would be too much. Then I realised I was being an idiot because less is more does not apply to medieval art.
Normally I would embed the cords in the seam, but in this case I’d used a method which creates a neat start, so I just sewed that end in place.
I took took each cord up the side before looping it over the top and anchoring it on the inside
The tassels are to be added in pairs. To get them to hang centrally I pierced the seam with a stiletto, which left a hole big enough to take the tassel cords through on a big bone needle
I loosely knotted the tails tails inside, until I had all of the tassels in place.
Obviously this left a lot of unsightly dangly tassels, so once they were in place I turned everything inside out. I pulled all the tails and knotted them tight( branston says this sounds cruel and painful) before snipping the excess and stitching each knot to the lining for extra security- because there’s nothing more annoying than one of your tassels falling off ( just ask any burlesque dancer).
right side out again and the next job is making eyelets in the tablet weave. I used a cream silk. The more eagle eyed amongst you might have noticed that this is the same piece of tablet weave that I made for the top of my other opus Anglicanum purse many years ago before this blog was even begun, and I no longer have any of that gold silk.
Once the cords were threaded I wrapped the ends together and sewed on the final few tassels. I feel I should add that I used fingerloop braids here because I’m still trying to make friends with fingerloop, but I think I would have been happier with the result if I’d used some other firm of twist or plait. I know fingerloop has it’ fans, but I find it unsatisfactory. I don’t think I’ll use it much again.
I made the lining from the bit I’d assembled from narrow strips left over from my striped dress. I french seamed it for balance.
Before whip stitching it into place
Thank goodness thats done! I have a list of a dozen jobs to do this weekend and I can finally cross one off!


More is definately always more in medieval art. As a good friend always says “More is more, less is for the poor”! 🙂 Looks fab!
I am very stupid sometimes, especially on Sunday afternoons
Can we have a finished picture, please. It looks lovely. (I’m secretly pleased the finger loop didn’t work … I can’t manage it. There are much better ways to make cords!)
There will be finished pics when Gareth takes them with the proper camera, as my phone can’t cope with gold.
I think my problem with fingerloop is that it remains stretchy, esp in silk, and I’m not a lover of stretchy
You’re right – everyone makes mistakes, and fixing them or dealing with them in some way is the sign of experience and skill!
Some people won’t admit they ever make mistakes at all though, which is silly. Many years ago I was chatting at an event with Sarah thursfield and another good costumier, and we were laughing at ourselves for sewing sleeves on inside out. A very stroppy voice behind us chirped “well I never do that” and stomped off. We all agreed that she was either lying or had only ever made one costume
Wow, not only an amazing finish, but also well done on covering the boo-boo so well. You’re right – that takes skill, creativity and being able to think outside the box (or purse in this case!).
I was a bit annoyed at first, but in the end I’m rather proud of that bodge. I think the sides measuring up wrong is as much in the stretch of the fabric during work and finish as it is in my crap maths, so am refusing to feel bad about it
Looks lovely (and finally finished!). And I agree – a well-corrected mistake, just like a well-executed mend, is something rather pleasing in and of itself. (Or maybe that’s just what I keep having to tell myself…)
yes, I was rahter pleased with the mend, so its not just you
I shall look forward to seeing the finished pic. I enjoyed my one go at finger looping although I made many mistakes 🙂 but I have not yet applied it to anything so don’t know whether I will like it in that respect.
My blog would be pretty empty if I did not right about my mistakes! Well done on resolving yours.
I think theres a rythm to fingerloop that you just get into. I think I like the finished results ok in wool, but I keep trying silk and hating the way it comes out
I never think about construction before I start and always end up in a mess. This business about learning from experience is rubbish! Your fudges came out beautifully, though. Is there a picture of the finished thing?
there will be finished pics when gareth takes them. I do thnk about contruction, this is the annoying thing, but it still comes out wrong. I’m begining to think a large part of the problem might be in how I stertch the finshed piece, cos if I tenstion them differently it could make a difference in the sizes