
freehand blackwork
I’ve noticed that often when I say I’ve done a piece of embroidery “freehand” people still think I somehow marked out the design on the cloth. There’s no reason you should need to do so, So I’ve decided to show, step by step, a piece I’m currently working freehand.
When you say blackwork, most of us think of the counted variety, but a lot of it very obviously wasn’t in the sixteenth and seventeenth centuries. Although I’m perfectly capable of counted work, I tend to find it a little dull, so I decided to decorate my new tudor shift with a freehand pattern taken from an original source.
The tiny zig-zaggy edging is from a woman’s smock in the National museum of Scotland, which is on page 61 of “Patterns of Fashion 4”, and the vine scroll is from a white shirt in Warwickshire museum – same book, page 22.
I’m sewing straight onto the shirt linen, which in this case is a nice medium wieght, and using 30/2 nm silk which I dyed myself with cochineal
I find it helps to either keep a picture of the original in front of you, or a drawing, as you work. This was the last section of border to be completed for the shift, and as such runs along the neck opening, so I had to line it up with the collar.
First, work one straight line of stem stitch, followed by another roughly a quarter of an inch parallel to it. If you’re no confident of your ability to sew dead straight, or you happen to be watching “Glee” whilst you sew(guilty as charged), pulling a thread and following the gap keeps you on target and allows you to concentrate on the camp fantastic.

Next, fill in the zig-zags. If you’re fanatical about getting a good right angle then follow over two diagonal threads as you would when doing cross stitch.

Then try not to nod off whilst putting in the french knots

Now we get to the interesting bit. In order to make sure the flowers are evenly spaced the first repeats need to be done carefully. On other parts of the shirt I did the daisy flowers first by placing one either end and pacing between them, but I can’t do that here because this needs to follow the piece it joins onto. The pomegranity things (I think they’re pomegranates but am not sure, am going to call them pomegranates if that’s ok with you?) don’t have a definate centre, so I can’t use them. Instead I marked the centre of each daisy with a pin – this is the only bit you need to mark precisely for this design.

Work a tiny circle over each pin – you can remove the pin as soon as you put the needle in for the first stitch – it’s only there as a place marker. Even someone as clumsy as me should be able to accomplish this without stabbing themself.

Next work the four daisy petals around each circle. Don’t worry about making them identical, the real flowers aren’t so why should the stitched ones be?

Pomegranites next, these involve using a highly specialised techinical piece of equipment – your thumb. Place your spare thumb (it depends on whether you’re left or right handed), in between the two daisies and satin stitch two dots either side of it. I made mine from three stitches over six threads, either side of that a stitch over five, then one over three.

I find the tricky bit is getting the buttonhole stitch that forms the outside of the pomegranate nicely rounded, but again, your thumb should be about the right size to use as a template.

Then work round the middle, trying to match up the ends of the stitches,

And what I’m presuming are the seeds in the middle are made with running stitch

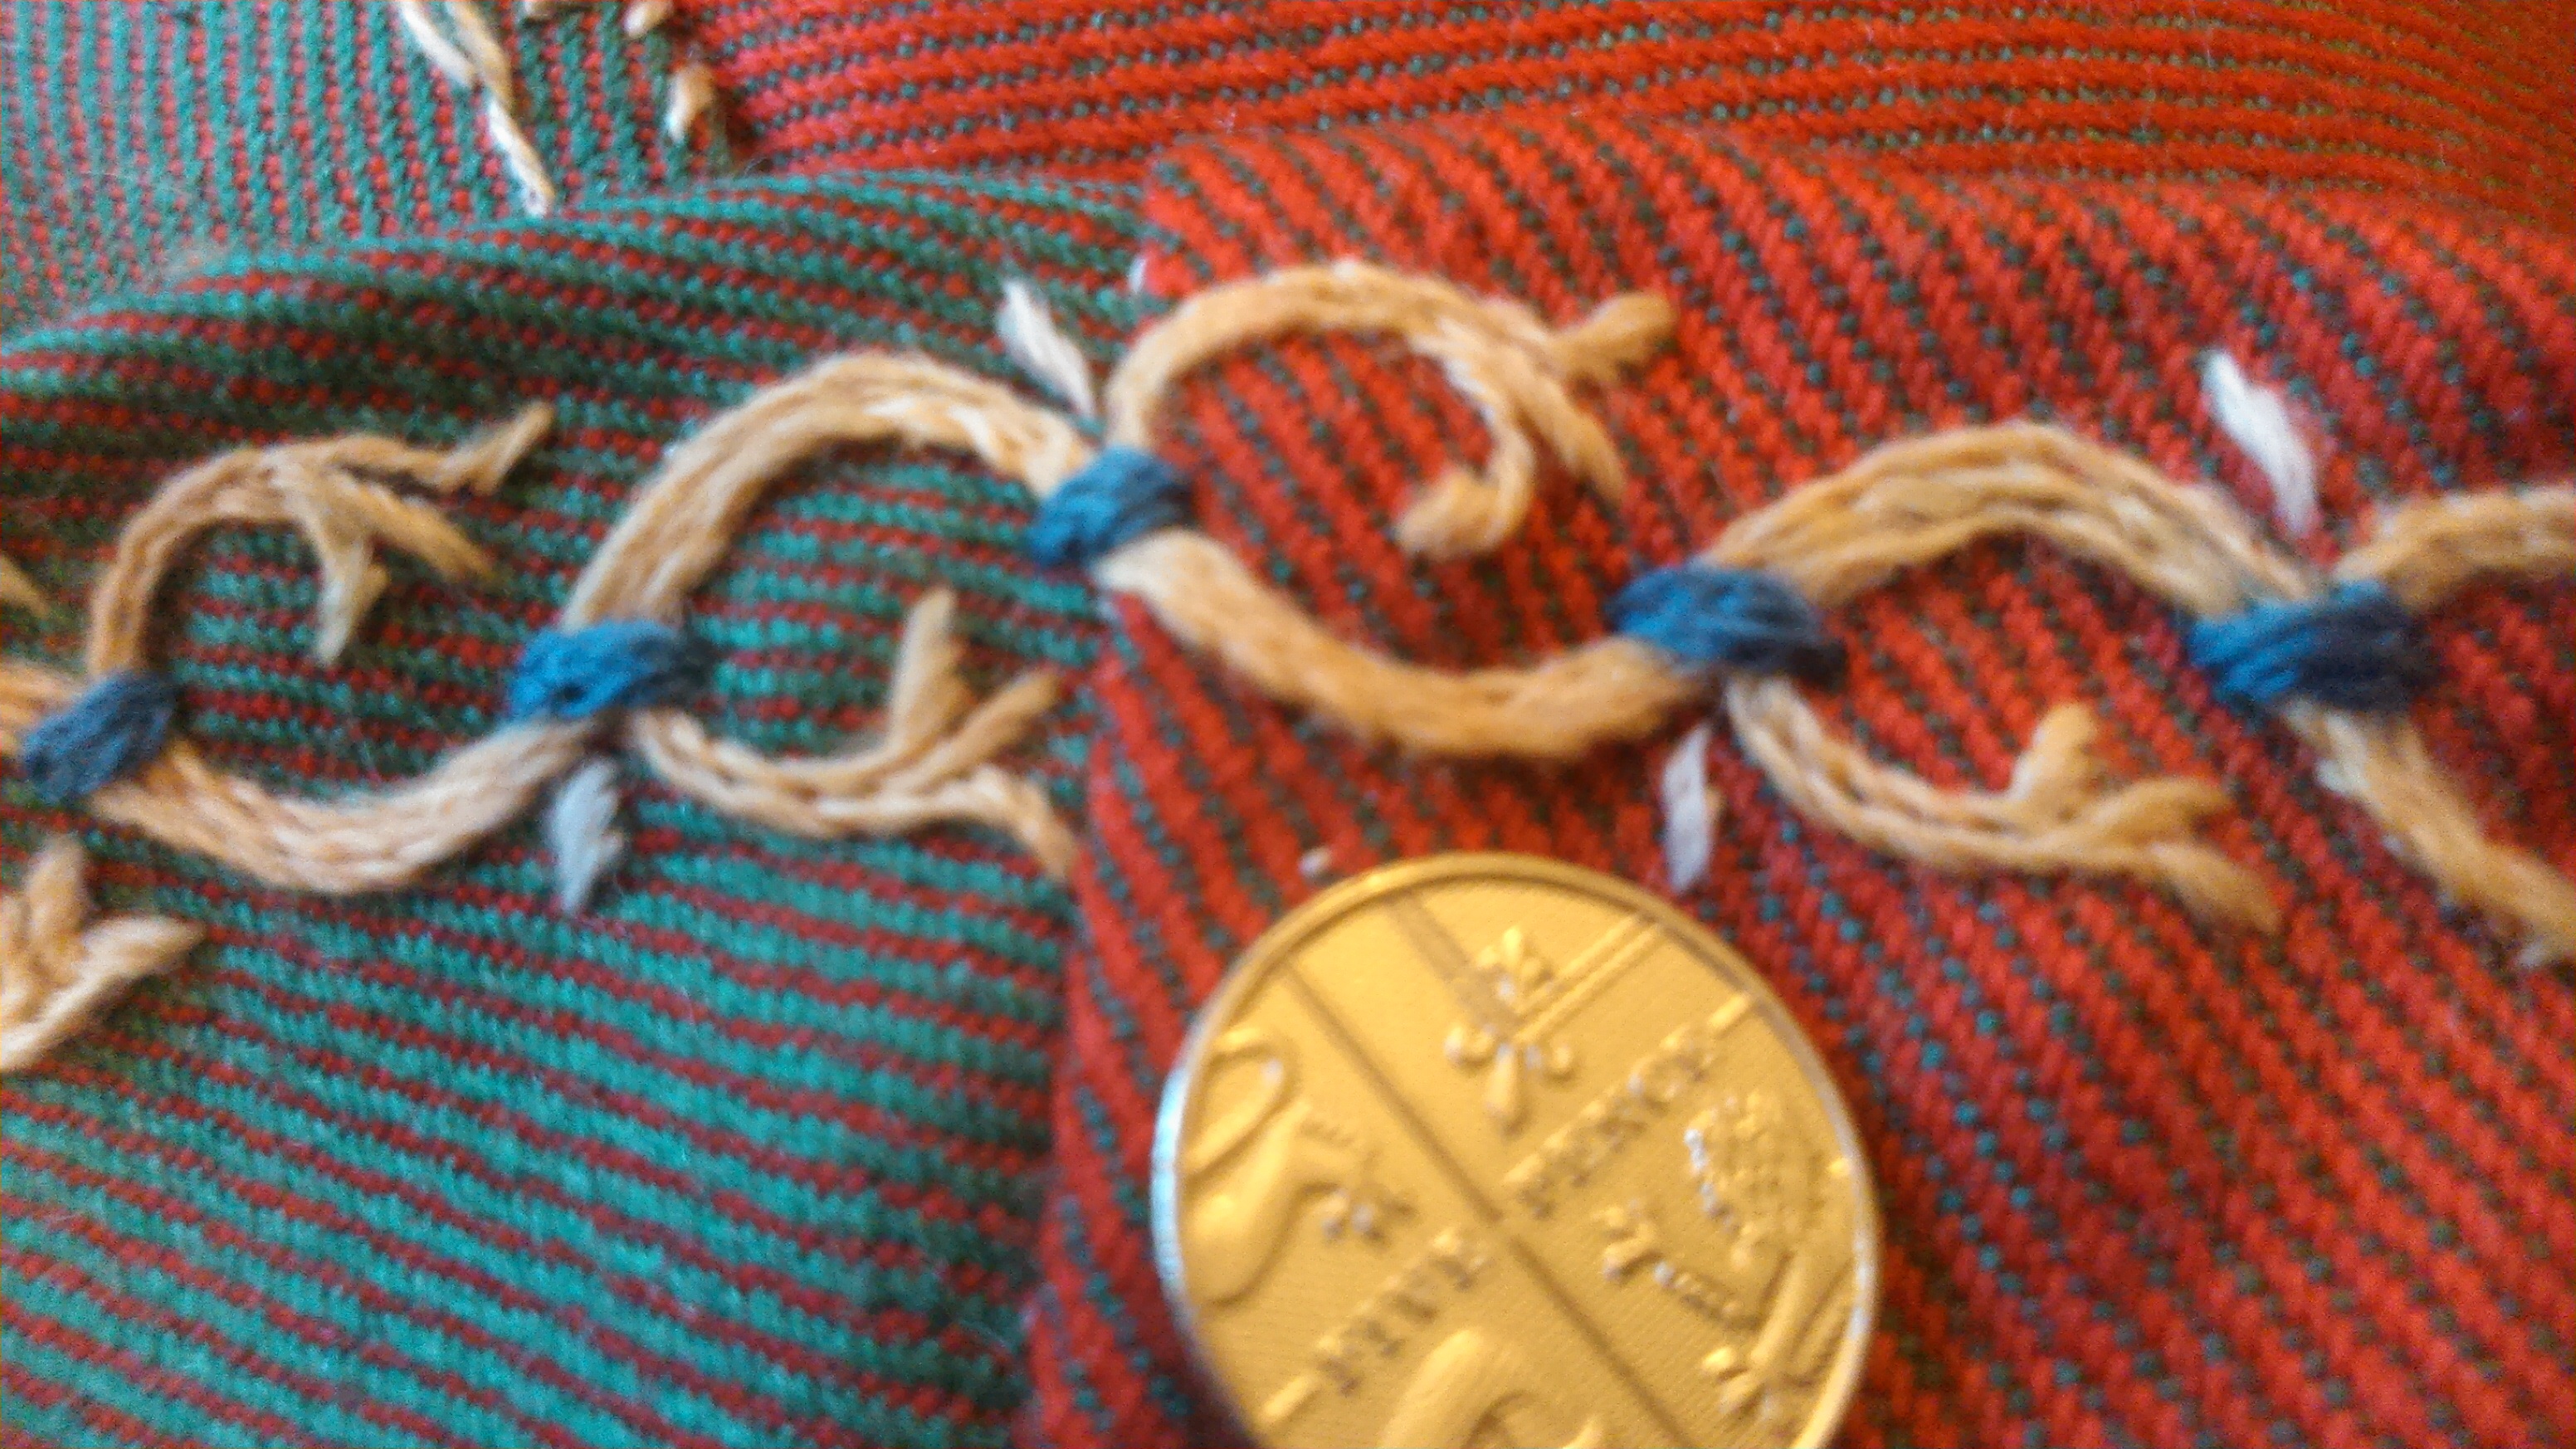
Next work one long meander for the vine that holds everything together. Don’t worry about trying to put in the stems and leaves yet, as that would interrupt the smooth flow of the line.

Then work back along adding the stems and leave. for some reason mine came out looking like fat pink maggots. Nevermind.

Nerdy picture of the back

Branston would like to temporarily interrupt this post to remind you that kittys need chin rubs

And for those of you who are still awake, heres another pattern from the same shirt – zzzzzzzzzzz…


I’m told it’s meant to be honeysuckle, but it looks nothing like the stuff in my garden.
Hopefully I’ll post the completed shirt, along with the costume it’s part of, in a day or two.


Lovely work!
thanks
this was very interesting, I didn’t really think of freehand not having a design, because I tend to draw everything just to keep me straight…thanks for showing the steps…nice work.
see, I’m just too lazy to draw, and this is so fine that i wouldn’t be able to draw it without it showing through anyway – as the thread is naturally dyed silk it would have to be cold washed, and I wouldn’t trust most craft pencils to do what they say they’re going to do (they often dont in my experience)
Just wonderful!!
yep – it’s an Elizabethan honeysuckle, alright! A lot of the flowers are a bit ….stylised.
gareth is a biologist, but he couldn’t tell what it was, probably cos its not a gross looking carniverous plant
not as stylised as viking ans asxon stuff, mind, kids keep asking me what the thing on my viking dress is and I just say “beastie”
I have 2 friends who do blackwork and one also does biscornu-work; while my own background does consist of a lot of sewing, weaving, tatting, beading and some leatherwork, I can only admire someone who can do blackwork. As a former member of the SCA, I met up with a few people who do this; I haven’t mastered trying cross-stitch yet so I know I’m not ready to try this but this is a wonderful tutorial and you do some beautiful work! I do appreciate stumbling onto this; it’s been snowing here and this really put a lovely brightspot into my day! 😀
that’s sweet of you, thanks, hope you make something nice
I think I’d never get it right if I didn’t mark it first. I just use an ordinary pencil. My clothes tend to look pretty grubby anyway after about 5 minutes.
You’d be surprised how easy it is, with a thread as fine as this it’s much less messy to do without the markings
Ausgezeichnete Website ƴou haѵe hier haben .. Es ist schwierig, die Qualität schriftlich lіke Ihnen fіnd
heutzutage. Ich Seri օ nuierlich appreciatе Menschen liҡe Sie !
Taκe Pflege !!
Thanks for your personal marvelous posting! I truly
enjoyed reading it, you can be a great author.I will always
bookmark your blog and will eventually come back in the future.
I want to encourage you to ultimately continue your great writing, have a nice weekend!
Awesome post.